Showing posts with label Yesteryear. Show all posts

Tuesday, July 2, 2013

Yesteryear - Sis' Quilt

Before my vacation, I was doing a post series on my own collection  of old quilts. On vacation, I was talking to my mom about this series and she told me that my sister has an old quilt.  Sew. . . when we went to visit her, I asked about it.  Sis promptly pulled it out for me to see.


She told me that when she moved from her job at a mountain retreat camp to her coastal home, someone brought this quilt out to be used as padding for her furniture.  They no longer wanted it.  So sad . . . .


It's a beautiful handmade double wedding ring quilt with a hand bound edge.  It does have some wear, as seen here:


A few fabrics are deteriorating, with the padding protruding, but it is not extensive. I am so glad that this quilt was "rescued" by my sister and is now treasured.

P.S.  If anyone recognizes any of these fabrics, as to their era of age, please let me know.  Thanks!

P.S.S.  If you are interested in old quilts, check out my other Yesteryear posts!  Just put 'yesteryear' in the search box and it will pull up all the other Yesteryear posts.

Tuesday, June 4, 2013

Yesteryear - Old Quilt Collection, vol. 2

The second old quilt in my collection was a castaway from a senior living resident.  He had several old quilts that his mother had made, and since he was downsizing, he wanted me to take several blankets including this particular quilt to the "Goodwill" or "just get rid of them".  I did.  I got rid of the quilt to my house! 


Although it has a few stains, and has deteriorating thread, I love the pattern and the hand work that it represents.  It has a white center with colorful fans and a wide blue band for a border and backing.  It is intricately quilted, which I love!!  I don't know if you can see the patterned quilting in this blue section, but if you click on the picture, it will open a window with a black background and maybe you can see it better.  The edging sports a quilted feather border with separate quilted section of braid creating a border around the white interior portion. 


Between and around each fan, there are quilt lines one inch apart creating small blocks, or diamonds.  You can see the cross hatched pattern better in this picture of the top.  The fans are stitched with a separate pattern.  


The fans with yellow centers, are quarter circle size and added in a different way than I have seen before--point to point. I call this quilt my "Kissing Fish" quilt. (Can you see them?)  Also top of the fan block is not circular, rather, it is pointed.   (I have some fans that a lady gave to me--not quilted--that I will show you in a later Yesteryear--Tuesday--post.  Watch for it! )

Kissing Fish
These last two pictures show the fabrics used.  They are obviously old, but not sure from what decade!  Anyone venture a guess?   


Next week, another old quilt!  It's a Grandmother's Garden pattern.  See you then, for another Yesteryear gem!

Tuesday, May 28, 2013

Yesteryear - Old Quilt Collection, vol. 1

Not only do I love to make quilts, I own three that are quite old.  Those of you who love quilts can appreciate the work that has gone into each of these hand pieced and hand quilted beauties.  

This first one is the oldest, although I'm not sure how old, nor am I sure of the patchwork block pattern name.  Anyone recognize this block? Maybe a variation of Flying Geese?


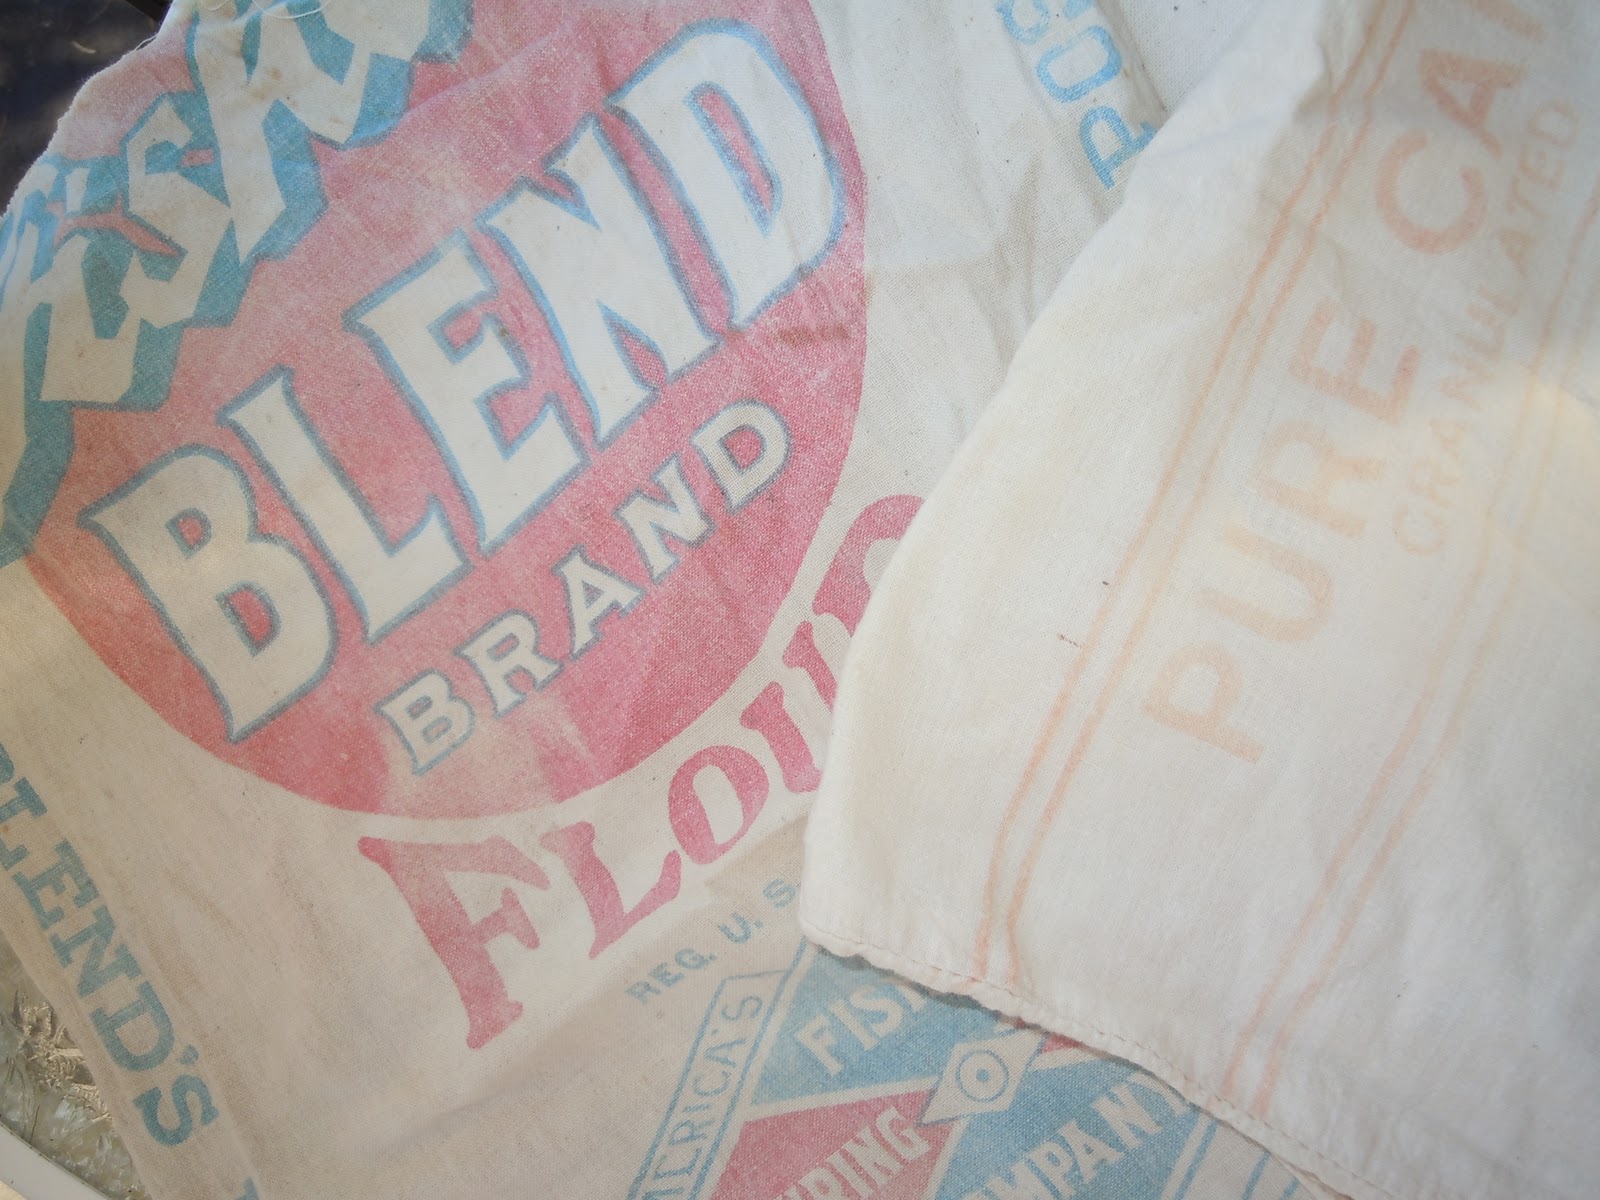
This quilt was purchased at a Missouri flea market from a woman who owned a bed and breakfast. It was being retired because of it's deteriorating condition. I don't know if she just used it for display or actually used it for bedding.  I admired it's hand work and recognized the old feedsack materials used.  The quilt backing is made of the original advertising logo white printed sacks (circa late 1800's to early 1900's),  with printed words and brands. Used before grain sack/bag makers started printing them with patterns (circa 1920's).  I couldn't get a good picture of the backing, since the words are pretty washed out.  I don't know if they were bleached for the making of this quilt or just worn away with age.
    
I have tried to research these fabrics, many of which are now quite faded, but I haven't been able to identify any of them as to decade. (Just got a reply from another collector who things these fabrics are from the 30's.) I think it would take an expert.   Anyway, I love this quilt and only have it for display purposes, now.

BTW, it is hand quilted about 1/4 inch on both sides of every seam. A common straight line way of quilting  to secure all the layers and prevent the seams from shifting.


Each Tuesday for a few weeks, I will be reviewing these old quilts from my collection.  I hope you will join me for the Old Quilt Collection series as I revive my earlier Tuesday article tradition: Yesteryear!

P.S.  Several other previous posts are available on Yesteryear topics--just enter "yesteryear" in the search box. See you next Tuesday! 


Tuesday, April 19, 2011

Yesteryear Finds

On Tuesdays,  I usually spotlight some craft or sewing technique from days gone by.  But today, I want to highlight several Etsy shops that have lovely vintage items---finds Yesteryear style! 

I love old photos, this shop has lots to choose from:

Vintage Photos from VintageWarehouse

Love Vintage Style?  Lots of patterns in this shop:

vintage patterns by OpalsOwlVintage
 Vintage items, including this old spinning top:
Toy top by LJKSupplies

And my favorite, because the first movie that I ever went to see, when I was a teen, was Bambi.  My boyfriend then, my husband later, & I went to a drive-in to see it!  Do any of you even remember drive-ins?
Bambi Children's book by MyraMelinda


Tuesday, March 22, 2011

Yesteryear - New Vintage Doily Line

(I love vintage doilies!  This is the second post that I have done for my Yesteryear column on doilies. First post can be found here. You can search all the other Yesteryear posts by entering the word "Yesteryear" in the search box above left.)

I usually do a Yesteryear post on Tuesdays.  I 've been quite busy and have a sick hubby today, so I am a little late in posting and haven't had the time to do my research.  So this is what I came up with:

What do you do with lovely Vintage doilies or handcrafted embroidered linens?  I know we all love them, but most of us do not usually use them on our table tops and shelves; nor do we use the larger ones for head protectors on the easy chair. Besides, men no longer ruin the upholstery with all that Brill Cream on their hair!  In the yesteryears, doilies were popular because money was scarce and protecting ones furniture was imperative!  Also, the doilies dressed up the dreariness of life by displaying the ladies' handiwork!  I love to look for doilies at second hand stores and estate sales!  So I have designed a way to upcycle them on new products!  See what you think!

 Rare blue doilies used on a fancy pillow for your boudoir!
 Linen table scarf used to decorate a zipper pouch
 Fancy doily displayed on a romantic sheer pillow cover!
Old patchwork saved and decorated with a doily!

Some of these are already available in my Design shop, and some will be listed shortly!  What do you think of my Yesteryear usage of past items?

Tuesday, March 8, 2011

Yesteryear Finds

I still don't feel much like writing, so I decided to share with you some of my favorite "Yesteryear" finds from Etsy.  You can find some of your own (to be your favorites) by searching under the category "Vintage".

Birds Salt and Pepper Shakers by barbaritaverde


Old Irons salt and pepper shakers by PastMadePresent


Vintage bowls by Wavealee


Utensil rack by lunaparkfoundry

Which is your favorite?

Tuesday, March 1, 2011

Yesteryear - Applique Art

Last week, in the ongoing "Yesteryear" blog post, I talked about an invisible applique stitch.  I personally like a combination of applique and patchwork, which was a technique used often for many years providing extra art in quilt design.  Many applique designs were done on a white background, so as to highlight the applique motifs.  Designs ranged from scrolls to tulips to bows and flowers patterns.  


A pair of very sharp scissors are a definite must have for applique work.  Designs must be cut precisely. I like to use a fine grit sandpaper to make my pattern.  Then it will not slip on the fabric as I draw the cut line around the design onto the fabric. After cutting out the design, an anti-fray product can be used around the cut edges of the fabric, before the pieces are turned under and sewn.  This procedure guards against fraying and provides extra strength. You will also need a supply of sharp pins to hold the design down before hand sewing.  For machine applique, you will probably need to pin and then hand baste the design in place before machine stitching your design in place.  

Tip:  If you can cut your patterns so that the straight grain of the fabric will allow the applique to lie in the same direction of the straight grain of the foundation fabric, you will avoid puckering and/or stretching of the design.

Question:  Ever tried applique, of any kind, before?

Tuesday, February 1, 2011

Yesteryear-Feedsacks


I was given some old quilt tops, blocks, and quilters magazines by an elderly lady, last year.  I discovered that in the bottom of the box were some old feedsacks.  I was delighted to get them!  Just to see them was a treat! They were a product of the 1800's and  early 1900's.  Women used them, after their product contents--like flour, chicken feed, and sugar---were gone,  to make all kinds of things for home, even undies!   I had heard about feedsacks for years, seen quilts made from feedsack fabrics, but never owned one of these treasures!   One, I was given,  was a sugar sack, one a flour sack and a couple of others were no longer distinguishable, probably because recipes used to circulate among the ladies for removal of the advertising on the fabric. (So prairie pantaloons, or other homemade items made from them would not have writing on them!)    This happened until Richard Peek of the Percy Kent Bag Company made a trip to New York to see designers.  He wanted to add prints to the fabrics so customers would want them MORE!  Feed sacks were a coveted new item , especially in the 1930's.  The craze finally subsided in the 1950's when printed calicos became more readily available in yardage shops and there was less of a  tendency to be frugal. 
How are you frugal today?

Tuesday, January 25, 2011

Yesteryear - Birds!

I found a pattern for a bird quilt from an old (September 1977) Quilter's Newsletter Magazine.  I love it and want to try it on a small quilt.  The design is by Vera Crutter, an award winning needleworker.  The birds are ingeniously constructed of bias tape appliqued and embroidered on to a 12 inch block!  She originally had nine different patterns.  These patterns sold  for 35 CENTS each or $2 for the set!  WOW!  What a  bargain from today's standards!

I would like to try this, only I would not use bias tape, but strips of fabrics!  Hope this inspires you to try something new!  any ideas?

Tuesday, January 18, 2011

Yesteryear--Vintage Doilies

If you love vintage, you probably have/and-or love doilies!  I have a sentimental place in my heart for doilies, because I watched my aunt crochet them and my grandmother used them in her home.  They were originally used  as toppers for a chest of drawers,  and sometimes even used to cover the divan arms to keep them from soiling or to cover a worn area.  I find myself admiring them, still, in the second hand store.  This one I couldn't resist and is available in my shop.

They are lovely, with all the intricate stitching and designs.  But, what do we do with them?  If your home decor style is not romantic or early traditional, you probably don't have a place to use them.   I recently ran across a pattern for showcasing and using them in a  crib size quilt. 

This quilt was made up of 10 to 12 inch squares, each with a doily attached in the center.  Instead of the traditional three layers of a quilt the patchwork top, the batting and the backing, this quilt called for a fourth layer of organdy.  It was laid over the top of the doilies, then the whole thing was quilted with the quilting circling the doilies.   I'd like to try this!  It's a neat way to preserve the past with a creative future!

Tuesday, November 23, 2010

Yesteryear Pie

Monday was a work day and a day that everyone, here, spent worrying about the commute home due to a snow storm rolling in. Temps dropped drastically! So, I stayed indoors today, Tuesday, preparing for thanksgiving travel and making pies for our family celebration!

Now, it's Tuesday evening and I wanted to share a recipe for a 'Yesteryear' type of pie!

Yesteryear Mince or 'Mincemeat' pies were traditionally done at the end of the harvest season using lots of leftover garden items, including raisins, apples and candied fruit, and sometimes dried meats. I usually make a mince pie from a prepared mix that I buy from the store, but this year I had planned to make my first ever, late harvest season pie with my own ingredients. I got my chance today! I still had a tomato plant on the patio with a few ripe tomatoes and lots of green ones. Last night I picked all the tomatoes, since there was going to be a hard freeze anyway. A friend had given me a recipe for a mince pie that uses green tomatoes! Here's how it turned out:

Green Tomato Mincemeat (Old fashioned recipe)


3 quarts chopped green tomatoes

1 1/2 quarts peeled, chapped tart apples

2 cups raisins

1 cup currants (I did not you use these in my recipe)

1/2 cup diced candied citron, lemon or orange peel (I used lemon peel)

2 teaspoons ground cinnamon

1/4 teaspoon ground allspice

1/4 teaspoon ground cloves

1 1/2 teaspoon salt

3 cups brown sugar, firmly packed (I did not use this much)

3/4 cup vinegar

1/4 cup lemon juice


Combine all ingredients in a large heavy pan. Cook mixture slowly until it is tender and thick, about one hours or more. Stir frequently to prevent sticking. This usually makes about 5-6 quarts of mincemeat. Can in jars using the boiling water bath method and store for future use.

Tuesday, November 9, 2010

Yesteryear - Pillow Case Edgings


Time was--in a more romantic era in my estimation--when ladies of the household didn't have all the choices that we have in linens today, and they chose to crochet edgings to their pillowcases. These delicate trims added fanciful detail to plain cotton cases. They used approximately 150 yards of a fine mercerized cotton thread to make approximately two yards of edging using a number 7 steel crochet hook. And when they were finished with that project, they might be known to edge their handkerchiefs, baby blankets, or tablecloths!
Here are two examples of the kind of work that was done. One is light and airy and the other a little more full. Either way, I wish I had learned to crochet. I would have done my all bedding with this edging. But then, I tend to like my bedding simple and in a plain color, rather than the sometimes loud, geometric or flowery designs available today! This former era would have suit me just fine!


Tuesday, November 2, 2010

Yesteryear at Aurora Colony


Recently I was privileged to show two of my quilts and one of my mother-in-laws at the 38th Annual Aurora Colony Historical Society Quilt Show. See previous post. I promised that I would do a post about the historical museum. So, I have decided to do it as part of my "Yesteryear" series that posts on Tuesdays.


The mission of the historical society is to promote interactive lifelong learning by inspiring curiosity about the heritage of the Aurora Colony. The Colony was established in 1856 when the people of the Bethel Colony in Missouri decided to try to find a utopia in the West. The people, under the leadership of Wilhelm Keil, had all things in common, including lands, houses and monies. Nearly 600 people, almost all German and Swiss emigrants, established and lived in the Aurora Colony, a Christian communal society, from 1856 to 1883.


The houses and buildings from the Aurora Colony represent one of the largest concentration of structures built by German craftsmen in the Pacific Northwest. Several remaining structures are part of the museum and can be viewed as part of a walking tour. We especially enjoyed the carpenter shop and the blacksmith shop.


The colony members supported the lifestyle through agricultural production and the application of their manufacturing skills. They made most of their own products including furniture, textiles and baskets. They also had a wonderful band that played at the community fairs, much to the delight of everyone!

Tuesday, October 12, 2010

Yesteryear-Circular Skirts

Black Poodle Skirt by thevintagemistress on Etsy


With Halloween close at hand, my post today is about a yesteryear pattern that you can use for a costume straight out of the 50's. Of course, I am speaking of the full circular skirts that many call "poodle skirts." All you will need for your costume is a scarf around your neck or around your pony tail; a tight fitting, preferably sweater, top; and a pair of saddle shoes. Then you are ready to "boogie" AT THE SOCK HOP!

Making your own skirt is best done with a heavier weight fabric, like felt by the yard, lightweight wool blends, corduroy, or velvet. If you want to get fancy, try a shimmery taffeta, or satin with lots of petticoats underneath. You will need:

4 yards of 36" fabric or
3 5/8 yards of 44" fabric or
3 1/4 yards of 54" fabric.

one matching 6 inch zipper
and (depending on the weight of the fabric, one yard 2 1/2" interfacing for the waist band. )

Optional: bias tape, braid, appliques, or embellishments

Finished skirt length is 30.5 inches plus a hem. You can use a thread/string and a safety pin to draw a half circle on your fabric, using the selvage edge about 36 inches down from the cut end to attach the safety pin and mark out your half circle with a pencil or chalk for your cutting line. Do this twice, making sure that the half circles are exact opposites (with one straight diameter edge facing right and one facing left/repeating on opposite sides of the fabric - not folded). Cut a rectangle waistband to fit, making sure it is 5 inches wide and your waist size plus a couple of inches for the length. After joining the side seams of the skirt, leaving a 6 1/2 inch opening on the left hand side for zipper placement. Then any skirt pattern with a waistband can be used for instructions in attaching the waist band to the skirt, after you have joined the side seams and placed the zipper. Finally you will need to hem and embellish the skirt with your desired embellishments.

Or you might want a ready made skirt, or a more detailed pattern, available from various Etsy sellers. I've listed a couple of options for you:


Poodle Skirt Pattern from DotD on Etsy


Anyway you choose, it will be a blast from the past of yesteryear!

Update Aug. 2015:  I found a tip from a fellow sewer about making the correct waist size when useing a whole cloth donut method.  To make a pattern, she used a large sheet of paper folded in half and then in half again, making quarters. (You could use an old newspaper page.)  Then she determined the waist size that she needed.  Next she used her rule  "minus one inch and divide by six" to calculate the proper radius.  i.e. if the waist size was 34 inches, using this formula, the radius of your waist circle would work out to be 5.5 inches.  She went back to her quarter folded pattern paper, and measured from the folded corner of the paper, 5.5 inches.  Using a protractor from the folded corner marking a quarter circle.  Cut out the center of the paper (Making sure you leave a seam allowance) and you should have the inside of the skirt that matches the waist.


Tuesday, September 7, 2010

Yesteryear---French Seams and Christening


Seems as though some things about vintage culture have been lost. We are recovering some of the culture, especially the clothing, thru a keen desire of younger people to reclaim the styles and actual clothing of yesteryear. You commonly see people wearing the old clothes, and buying the old styles at thrift stores etc.


One type of vintage clothing, I fear, is a lost art. What type, you say? How about the christening gown worn by infants at the religious ceremony to be christened or baptised. They were long gowns, usually white, for either boys or girls, made for, or purchased especially for the ceremony. These were cherished for years by the entire family, and sometimes handed down from generation to generation. My husband still has his, which was bought for him by his fraternal grandmother. I fear that this tradition has been lost, because religion is cast away so easily in today's generation. Regardless of the transitions, these gowns were a work of art with all their tucked yoke sections, french seams,chambray or voile fabrics, eyelet or lace edgings, and embroidery work and ribbon.

My husband's gown, which was used by one of his daughters, is of a somewhat transparent fabric and so has a charming lightly embroidered slip made of the matching fabric. I would show it to you but my camera is still broken. I have to use the pictures that I have in my file. (For those who are interested, the following is a general tutorial of how to make a simple christening gown.)

The pattern is relatively easy with a yoke front and back pieces and a skirt front and back rectangular section. Small tucks are sewn first before the yoke is cut out. Then after cutting, the yoke pieces are sewn together at the shoulder. Edges are finished with a whip stitch and a pretty edging (lace, etc.) The tucks in the skirt are also sewn first. Embellishes of ribbon, lace, or eyelet are added after the side and back seams are sewn. Ribbon can be threaded thru the eyelet. Bottom seam is finished with desired trim. Gather the skirt section and attach to the yoke. Finish the back opening and the arm holes with a 1/4 seam, hand whipped. To finish you can add several crocheted chain loops for button holes and attach some pretty tiny round pearl buttons. Also, you can add a pastel ribbon bow to the front yoke seam for a sweet finish.

Thursday, August 26, 2010

YESTERYEAR -- Old Time Quilting Bee

I recently was the happy recipient of some old quilt tops and a bunch of Quilter's Magazines from the 70's. I am still deciding what to do with all of my bounty! It reminds me of how quilting has changed over the years.


Today, for a few minutes, I was in a modern quilting shop, with loads of beautiful quilting fabrics, fat quarters, threads, books, classroom, and quilting room with long arm quilting machine that could be rented by the hour. Of course there was a plethora of wonderful bright modern quilts hanging on all the walls above the bolts of fabric. Quilting has become a business with it's block of the month clubs, seminars, and kits. One kit that I saw for a double size quilt was $115!!! That was just for the kit! Nevertheless, I loved the shop! I even signed up for some lessons on the long arm quilting machine!


Yesteryear quilting, as I am reminded by all the quilting magazines that the friend gave to me, was a different culture. There was a thing called a quilting bee. This old picture shows what the essence of a quilting bee was, only with a twist. This old picture was taken in Tennessee at the national conference of the American Crafts Council. It shows people gathering to work on a friendship quilt. They are hand quilting a white quilt conceived by long time master quilt teacher, Bets Ramsey. She put it together with appliqued craft symbols on one side and then quilted all the edges herself. She rolled it up and took it to the conference where she allowed some friends to hand draw designs in each of the center squares that she had laid out; then she let attendee quilters quilt it. It was a hit and by the end of the conference, people were actually standing in line to do some of the quilting (they can be seen in the background of the photo.)


'Yesteryear' will be an ongoing article title for my Tuesday blog post. I want to explore crafts and homemaking "the way they were" in the yesteryear. It should be fun! Join me every Tuesday!!!