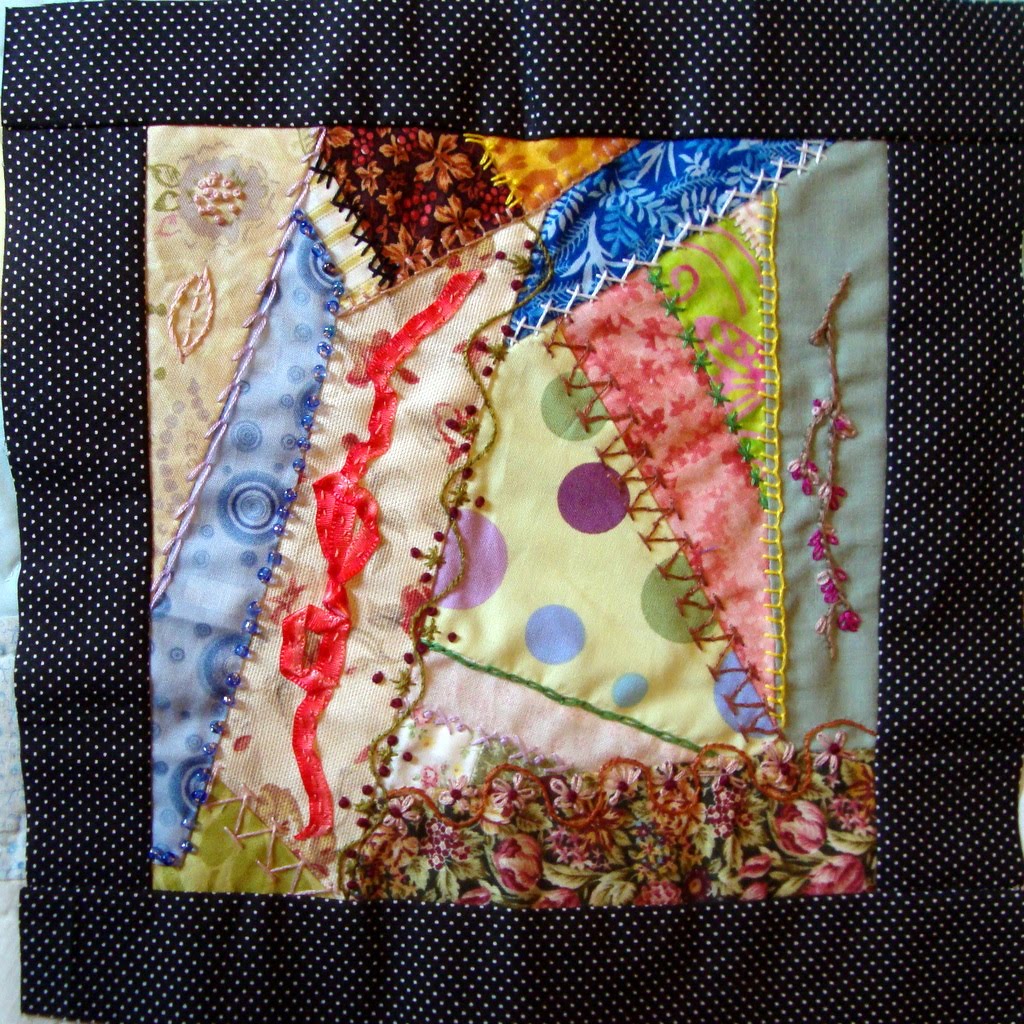
Showing posts with label crazy quilting. Show all posts

Friday, March 22, 2013

Emerging Foggy Spring

March, being the month of early Spring, was the month that I signed up to present a challenge for my favorite Etsy team.  This Spring challenge for the Blogging Business Artisans was called  Emerging Foggy Spring  (which is the title of my finished piece too!) and I wrote the challenge this way:

I am proposing that we try something this month that is a little softer.  I call it - Emerging Foggy Spring. Let's explore color in terms of tint. In color theory, a tint is the mixture of a color with white, which increases lightness. We often create with bright color and ignore tints of color. Create a project with muted tints leaving lots of white space, if you can. This project is to challenge your thought processes about color, using tints. Don't be intimidated by the absence of bright color. Get creative!

So here is what I came up with, and mind you, I didn't even have a clue what I was going to do, back when I signed up for presenting this challenge.  I have been thinking about it quite a bit, and today I got an idea.  


I started with a bunch of scrap fabric and made a crazy quilt block.  I decided to explore the WRONG side of the fabric.  Many fabrics have a whitish reverse side, where the color has only bled thru in the screen printing process. The pattern is not actually woven into the yardage. Thus it has a tinted look.  

At first, it was a bit daunting to my brain, sewing wrong sides together, since I am used to sewing with the right sides facing each other.  As you can see, I actually did the bottom two strips and the top right hand corner with the "right" side up to facilitate the design that I had in mind.  


Here is what is looks like on the "wrong" side --that I am not using--more colorful and not the stuff of this challenge:


Next, I made a quilt sandwich with it, adding the batting and backing and quilting a scene to it.  I used different colors of thread, from black to gray to white, to create the tree's depth in the fog, but it is hard to detect in this photo. (WOW, do I need a new camera--not just this phone camera--broke my good camera!- Maybe you can click on the photo and zoom in and see what I am talking about.)


Anyway, using the right side up in the bottom strips has created a more "real" look in the foreground.  The flower field then fades into the fog with the next strip being reversed to the tint side.  I also have the sun peaking thru the clouds at the top right using the "right" side of the fabric for the sun's brightness.


The actual quilting process shows the tree, flowers and swirling fog of the scene on top of the muted fabrics. 

Reverse of my quilt sandwich
I haven't decided yet how I will bind the little mini quilt, but I am quite proud of the way that it has turned out for a simple afternoon's work!  

P.S.  Linking today with Pink Saturday

Thursday, May 24, 2012

Scraps, scraps, and more SCRAPS!

While working on my regular projects, I seem to accumulate lots of scraps!   I have a little wire basket on my sewing desk that I pitch all my usable scraps into. 


When it gets too full, I stuff them in a large plastic Ziploc and hide them away somewhere--in the cupboard, under the bed, anywhere!  What to do with them--When to do something with them? Recently,  I needed the space in my cramped quarters, so I started a crazy quilt top with them.  You can do it too! Anyone can do it!  No need for fussy cutting, or worrying about cutting the patchwork pieces extremely straight.  There's really no wrong or right way to do this!  And there's no pre-prep needed to plan out the quilt top!  Just let it evolve!  A fun adventure with scraps!

You can start with any piece which serves as the middle of your finished block.  Next, sew on scraps; just match a fabric piece to any side of the first piece, making sure you sew a straight stitch.  You can even use a length of fabric that is too long for the side.  Trim it where you need it to end, once you have finished the seam. You keep building, not unlike a log cabin block (tutorial here), until you have the approximate finished size of the block you want.  Then, iron it out flat, trim any seams that are unwieldy. Next, cut a finished block, discarding the uneven and odd edge cuttings that were not used if they are too small.  Toss large enough pieces back into your scarp heap if they can be used again. 


Here I used a panel scrap for a corner. It needed to be cut to fit after the seam was finished.  I only needed a little piece of the red dot fabric to make the corner.

I'll share the progressions of one block here (Started with the purple piece):

find a piece to fit your side 

I felt it was a little short, no problem!

Added another scrap to the end of my scrap!

Regardless of the side, sew a straight line stitch-- trim later.

Finished seam.

A nearly finished block.

Trimmed and ironed--ready for use!

This is a simple way to use-up (upcycle) your scraps.  I will be sure to show off the rest of the process to a finished quilt top in future posts!  Watch for it!  And . . . try this yourself! 

Tuesday, May 8, 2012

Embroidery Embellishment

Coin Purse by PruittDesign
Lately, I am really enjoying embroidery.  I haven't really sold many of my embroidered art hoops, but I still enjoy embroidery in the evening; it's relaxing.  This weekend I was making a batch of zipper pouches for an upcoming craft show, when I was inspired to put embroidery on one of them.  It turned out pretty cute and I was pleased.  Apparently several Etsians were too, because it got several fave's in the first few hours that it was listed! 

I am wanting to do more elaborate designs, especially in conjunction with ribbon embroidery, crazy quilting and embellishing with beads.  I have done this before, even have a couple of items in my shop with crazy quilting (including this brooch that is clearance priced!)

Crazy Quilt Brooch by PruittCreations
but . . . I haven't done enought of it to suit me! One of my goals for 2012 involves being more extravagant.
So you can see what I am talking about, I have found a couple of Etsy items that I really like that utilize these techniques. 

Victorian Pillow by Kittyandme

Phone Pouch by HummingNeedles

And then there is my very favorite, Waterrose.  I like most everything that she embellishes, so do over 11,000 Etsy admirers!
Hydrangea Bridal Cuff by Waterrose


Hope this inspires you, like it does me, on to newer projects and different techniques! 
What are you longing to try?  Anything extravagant?

Friday, March 2, 2012

Friday Quilt Finds

Since I am at the SewExpo, actually the Sewing and Stitchery Expo, I thought that I would show some of my own favorite stitchery for Friday Finds!

Although this item is sold, I love the work that this Australian stitcher, Maria,  does!

Crazy quilting by mariadownunder


Hydrangea Quilt by DesignerDahliasEtc

And another quilt by Suzanne of Designer Dahlias Etc--I just love her quilts!

Red Quilt by Suzanne B Taylor
 See ya next week, with the report of the SewExpo--The biggest sewing party in America!!!

Thursday, November 18, 2010

current project


This current project is just for me!


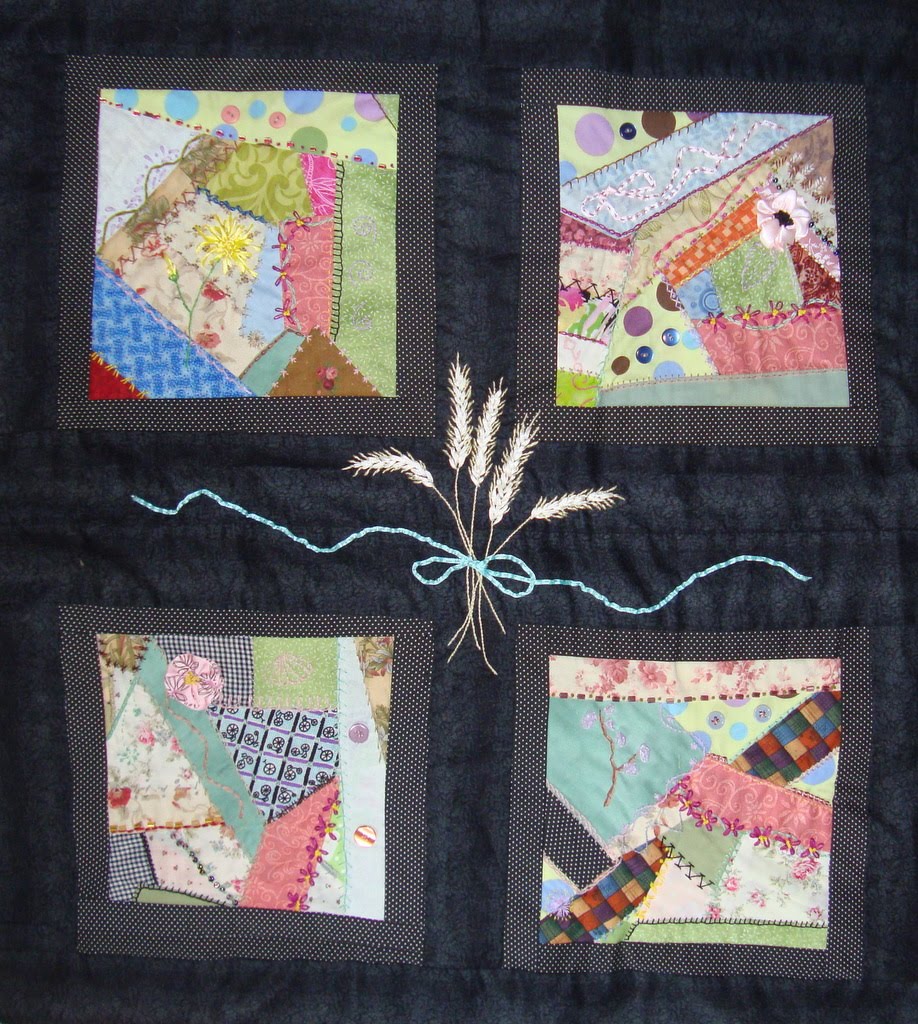
I have shown this project in process and in pieces before in this blog, but finally it is all together--well, I'm just finishing the hand quilting around the edges! It's a wall quilt that is approximately 36 by 36 inches. It will eventually hang over my dark leather couch.


I just love the wheat motif in the center of the piece!


I started it when I was staying at my daughter's house. I had lots of scraps and decided to use them up! Obviously, you never 'use up' all your scraps, but I had always wanted to try crazy quilting. Actually, I do my signature quilt with a crazy block, but it doesn't have any embroidery on it. I really like embroidery and enjoy doing it. I can do a little here and there, between other projects, because it's not like you 'have to finish' this kind of project. With Crazy quilting it is difficult to decide when you are finished! It's all in the eye of the beholder!

Anyway, What inspired me was a book that I bought from my book-of-the-month club on ribbon embroidery. I'm sorry the pictures are not very good or you could see that I tried a different ribbon embroidery technique on each block. I also used beads for accents. And I love that nothing has to be symmetrical in this type of project! Overall, this has been one of my greatest accomplishments to date!


Tuesday, August 31, 2010

Yesteryear - Origin of Crazy Quilts

CQ Brooch by thatOldBlueHouse2


If you search Etsy for 'Crazy Quilting' or 'Crazy Quilt' you will find that there are still crafters that make these lovely creations, but not that many. Mostly the discipline has evolved into small projects, like the one above by since there is a lot of work that goes into the embroidery and piecing.


"What is crazy quilting?" you say. Ruth Finley, in her book OLD PATCHWORK QUILTS, says that the Crazy Quilt is the oldest pattern in American quilts, although there are no examples of crazy quilts known to be made before the 19th Century. Most quilts authorities believe that Crazy Quilting was started because the colonists had to patch bed covers so much that they eventually became hidden under irregular shapes of fabric salvaged from clothing. There was no fabric available, except what was already made into clothing and furniture/furnishing that the colonists brought with them. This made it necessary to use every scrap that they could for patching. Housing what it was then, cold and drafty, made it necessary to patch bed covers to keep out the cold. Over time, these covers took on their patchwork look as the number of patches increased.

Victorian Crazy Quilt from Rocky Mountain Quilts


During the industrial revolution, Crazy Quilts were replaced with machine made blankets, until the Victorian era , when fancy fabrics were used for dress making and every scrap was then used for a crazy quilt for every parlor. It became somewhat of a fad for every home of means to have theirs in the parlor. This was a richer era in the 1870's and 80's, with velvets, and fancy silks which seemed to beg for embellishing. Thus lovely embroidery stitches began to grace the patches. This fad seemed to last about 25 years. During the dust bowl years of the 1930's there seems to be some revival of the discipline for purely frugal purposes, like the sample below:


1930's CQ block with a utilitarian look (and probably practically purposed originally) offered for crafting by kittyscatnip


CQ then emerged again after the 1960's for those who love embroidery work. I, myself, have a love for embroidery and I am in the process of creating a wall hanging and a matching pillow. This will eventually hang over my couch with the pillow gracing my sitee. (Is this called "coming full circle"?!)


Note: Today is the last day to comment on my contest post:

http://pruitthandcrafts.blogspot.com/2010/08/craft-season.html

Winner will be picked later today and announced tomorrow.

Tuesday, July 14, 2009

Creative Inspiration with Scraps!

Here's the start of another project! Yea!!!!
And it all started with my fabric scraps!


Creative inspiration finally came after a long dearth of motivation! I'm thrilled to be working on a new project! I have always wanted to do some crazy quilting, and this weekend, I started a pillow cover, that has grown to a quilt top! I'm excited about it, and of course, had to go to the local yardage shop to get more supplies--more yardage, embroidery threads, and ribbon!

Sunday, May 31, 2009

New Pillow Line


Well, summer is here. It's been in the 80's here in the Northwest and it is only the end of May. Many of us here have no cooling systems because of the usually mild weather. I sat at the sewing machine and really started to heat up because of the machine light and the ottlight that I use to see better. So, it made me make a decision--I'll be making simple projects, nothing elaborate at the sewing machine this summer!! I had been thinking of a line of pillows and pillow covers--lots of straight seams--and I think it will be my summer project!

I bought some beautiful trims, and I'm looking for some fancy fabrics to make some crazy patchwork pillows. Watch for them! I'll post a picture of the first one that I finish! I'll also have a few little sachet pillows later in the season. Just a taste of the summer offerings! Visit my etsy shop and my new shop at artfire.com http://countrygal.artfire.com/