While working on my regular projects, I seem to accumulate lots of scraps! I have a little wire basket on my sewing desk that I pitch all my usable scraps into.
When it gets too full, I stuff them in a large plastic Ziploc and hide them away somewhere--in the cupboard, under the bed, anywhere! What to do with them--When to do something with them? Recently, I needed the space in my cramped quarters, so I started a crazy quilt top with them. You can do it too! Anyone can do it! No need for fussy cutting, or worrying about cutting the patchwork pieces extremely straight. There's really no wrong or right way to do this! And there's no pre-prep needed to plan out the quilt top! Just let it evolve! A fun adventure with scraps!
You can start with any piece which serves as the middle of your finished block. Next, sew on scraps; just match a fabric piece to any side of the first piece, making sure you sew a straight stitch. You can even use a length of fabric that is too long for the side. Trim it where you need it to end, once you have finished the seam. You keep building, not unlike a log cabin block (tutorial
here), until you have the approximate finished size of the block you want. Then, iron it out flat, trim any seams that are unwieldy. Next, cut a finished block, discarding the uneven and odd edge cuttings that were not used if they are too small. Toss large enough pieces back into your scarp heap if they can be used again.
Here I used a panel scrap for a corner. It needed to be cut to fit after the seam was finished. I only needed a little piece of the red dot fabric to make the corner.
I'll share the progressions of one block here (Started with the purple piece):
 |
| find a piece to fit your side |
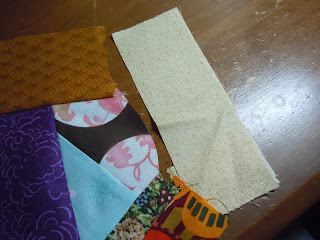 |
| I felt it was a little short, no problem! |
 |
| Added another scrap to the end of my scrap! |
 |
| Regardless of the side, sew a straight line stitch-- trim later. |
 |
| Finished seam. |
 |
| A nearly finished block. |
 |
| Trimmed and ironed--ready for use! |
This is a simple way to use-up (upcycle) your scraps. I will be sure to show off the rest of the process to a finished quilt top in future posts! Watch for it! And . . . try this yourself!


5 comments:
Wow...that's a great idea! And I was feeling guilty for trashing some of mine. Quilts are still a bit over my head, but now I know saving scraps is worth it!
What a fun effect! I have definitely done this before with paper.
It turned out great! What a fun way to use up your scraps!
I have tried this a couple of times and it comes out terrible! I think I take the 'crazy' too literally and then it is too hard to sew:)
I like how yours is turning out.
And thank you for linking up at the It’s a Wrap Link Party at Artful Rising.
Erika
When I get a sewing Maching I'll have to remember this. Love the idea! {:-D
Post a Comment